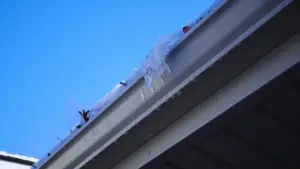
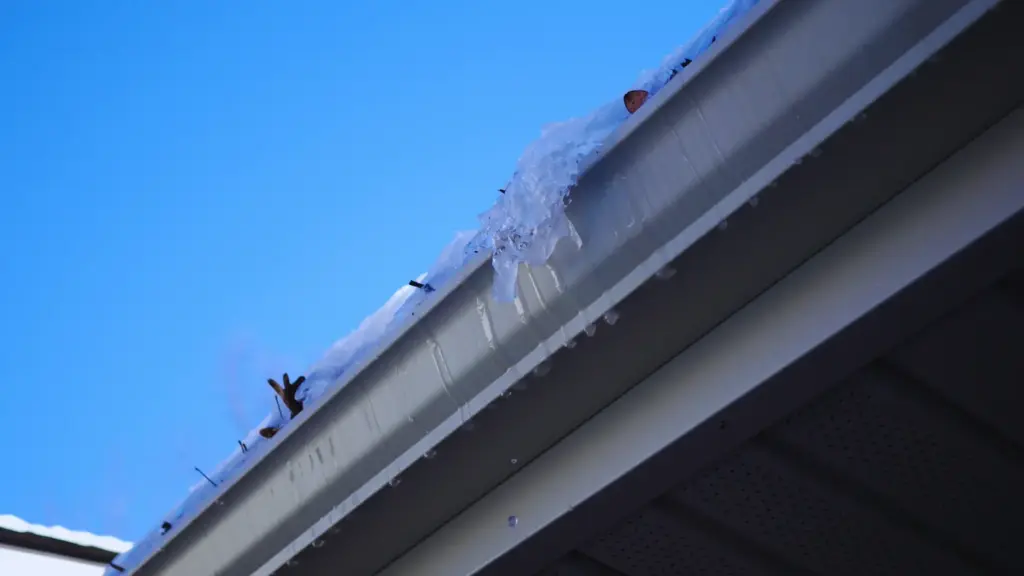
How to seal gutter joints is a question most homeowners ask only after they notice water dripping from a seam during a rainstorm, streaks of rust staining running down their siding, or soft wood appearing along the fascia board directly behind a leaking joint. Gutter joint failures are one of the most common and most overlooked sources of water damage on residential properties, quietly directing water against the home’s foundation, siding, and roof edge for months or years before the damage becomes visible.
By understanding what causes joint failures, what sealing products work best for each gutter material, and how to complete the repair correctly the first time, you can stop the leak permanently and protect the critical components around it. This guide covers everything you need to know.
What Does it Mean to Seal Gutter Joints? (The Simple Definition)
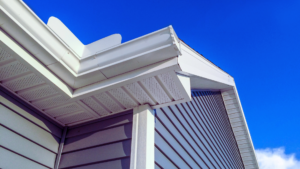
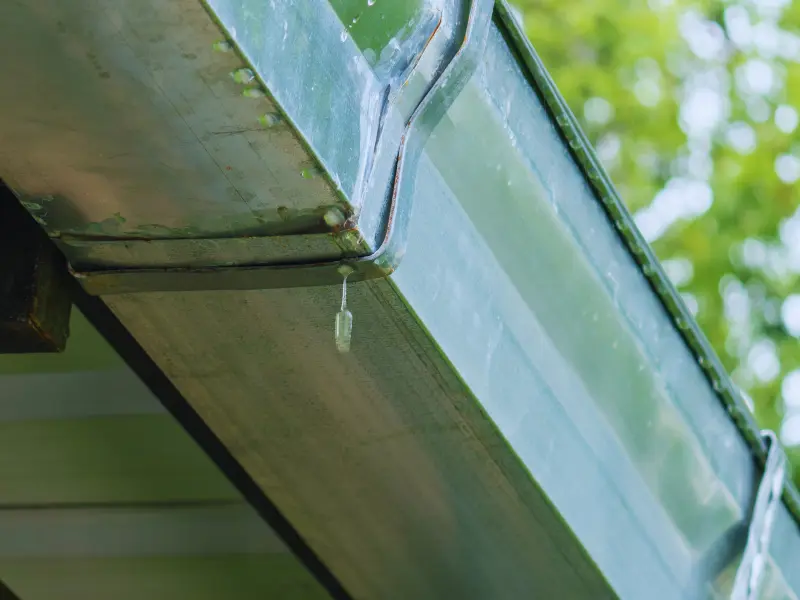
Sealing gutter joints is the process of applying a waterproof sealant or adhesive compound to the interior or exterior connection points between gutter sections, end caps, miters, and outlets to stop water from escaping the gutter channel at those seams. Sectional gutters, which are sold and installed in fixed lengths joined together at overlapping seams, rely entirely on sealant and, in some cases,s mechanical fasteners to remain watertight at every joint along their length.
Unlike seamless gutters that are roll-formed on site in a single continuous piece, sectional gutters have a joint every 10 to 12 feet on average, and each of those joints is a potential failure point that requires periodic maintenance to remain watertight.
Gutter Joint Types and Sealing Approach
| Joint Type | Location | Common Failure Mode | Sealing Approach |
|---|---|---|---|
| Section-to-section lap joint | Along the gutter run | Sealant dries out and cracks | Interior gutter sealant bead |
| End cap joint | Open the end of the gutter run | Cap pulls away from the gutter body | Sealant plus pop rivets |
| Miter joint (inside or outside corner) | At building corners | Flexing causes sealant separation | Flexible gutter sealant with overlap |
| Outlet or drop joint | Where the downspout connects | Debris buildup causes overflow and seal stress | Sealant around the full outlet collar |
| Slip joint connector | Between two gutter sections | The connector slides out of position | Sealant plus sheet metal screws |
Understanding which type of joint is leaking before purchasing materials ensures the repair method matches the failure mode rather than simply applying sealant over a problem that requires mechanical reinforcement as well.
Why Sealing Gutter Joints Matters (The Real Cost Breakdown)
The Cost of Ignoring a Leaking Gutter Joint
| Damage Caused by an Unsealed Joint | Repair Cost | Root Cause |
|---|---|---|
| Fascia board rot and replacement | $500 to $2,000 | Water running behind the gutter onto the wood fascia |
| Soffit damage and replacement | $400 to $1,500 | Overflow and joint drip saturating the soffit panel |
| Foundation crack repair | $2,000 to $8,000 | Joint leak directing water against the foundation |
| Siding staining and rot repair | $800 to $3,000 | Streaking water from an unsealed seam onto the siding |
| Landscaping and soil erosion repair | $300 to $1,500 | Concentrated drip from the joint erodes the bed and grade |
A tube of gutter sealant costs $6 to $15, and a 30-minute repair stops every one of these damage pathways permanently. No other home maintenance task delivers a higher return on investment relative to the time and material cost involved.
The Foundation Risk That Most Homeowners Miss
The most serious consequence of a long-term leaking gutter joint is not the visible staining on the siding. It is the water that runs down the exterior wall, pools against the foundation, and works its way into the basement walls or undermines the soil bearing capacity directly below the footing. Foundation repairs triggered by chronic water mismanagement at the gutter level routinely cost more than the entire gutter system replacement, making joint maintenance one of the highest-leverage water management tasks available to any homeowner.
Types of Gutter Sealant Products: Know Your Options First
Different gutter materials, climates, and joint types call for different sealant products, and choosing the wrong one is the most common reason a gutter joint repair fails within one season. Butyl rubber gutter sealant is the most widely recommended product for interior gutter joint sealing. It remains flexible through extreme temperature swings, bonds reliably to aluminum, steel, and vinyl gutter materials, and resists the constant moisture exposure inside the gutter channel. It is available in cartridge form for standard caulk guns and in smaller squeeze tubes for tight access points.
Silicone sealant is highly water-resistant and durable, but does not bond as reliably to metal gutter surfaces as butyl rubber, particularly when applied to surfaces that have any residual moisture or oxidation. It is better suited to exterior joint applications on vinyl gutters than to interior metal gutter sealing. Polyurethane sealant offers excellent adhesion to multiple substrates and strong flexibility,y but takes longer to cure than butyl products and is more sensitive to temperature at the time of application. It works well for miter joints and end caps that experience significant thermal movement.
Gutter lap sealant tape is a self-adhesive butyl tape product applied along the interior of lap joints before mechanical fastening. It is commonly used during new gutter installation, but can also serve as a repair product when applied to a properly cleaned and dried joint surface. Roof and gutter repair sealant in trowel-grade formulations provides a thicker application suitable for gap filling at joints with visible separation greater than 3 to 4 millimeters.
Trowel-grade products are not appropriate for standard lap joints where a clean bead of gun-applied sealant is the correct choice. Gutter repair fabric embedded in roofing cement or gutter sealant creates a reinforced patch suitable for joints with physical damage or corrosion around the s,eam rather than simple sealant failure.
How to Seal Gutter Joints: Step-by-Step Process
A properly completed gutter joint seal done in the correct sequence creates a bond that lasts five to ten years without reapplication.
Step 1: Clear the gutter of all debris. Remove all leaves, sediment, and standing water from the gutter channel before beginning any repair. Sealant applied over debris or wet surfaces will not bond and will fail within weeks.
Step 2: Dry the joint area completely. Allow the gutter interior to dry fully after cleaning. In cool or humid weather,ther this may require 24 hours of drying time. Accelerate drying with a heat gun or dry rag if the repair is time-sensitive.
Step 3: Remove all existing failed sealant. Use a putty knife or stiff plastic scraper to remove every trace of the old sealant from both surfaces of the joint. Applying new sealant over old, failed sealant creates a bond to the old material rather than the gutter surface and produces the same failure in a shorter time.
Step 4: Clean the joint surfaces with mineral spirits or isopropyl alcohol. Wipe both sides of the joint with a clean rag dampened with solvent to remove oxidation, oil, and any sealant residue the scraper left behind. Allow the solvent to flash off completely before applying the sealant.
Step 5: Apply sealant in a continuous bead along the full joint length. Load the cartridge into a caulk gun and apply a consistent bead of butyl gutter sealant along the interior seam, covering the full length of the overlap on both sides of the joint center. Do not apply in short sections or skip areas.
Step 6: Tool the sealant into the joint. Use a gloved finger or a caulk tool to press the sealant bead firmly into the seam and smooth it into a concave profile that sheds water away from the joint rather than collecting it. This tooling step is what converts a surface bead into a bonded seal.
Step 7: Allow full cure before water exposure. Most butyl gutter sealants require 24 to 48 hours to cure before water contact. Avoid running water through the gutter or allowing rain exposure during this window.
Gutter Joint Sealing Reference Chart
| Gutter Material | Recommended Sealant | Cure Time | Reapplication Interval |
|---|---|---|---|
| Aluminum sectional | Butyl rubber gutter sealant | 24 to 48 hours | Every 5 to 10 years |
| Vinyl sectional | Silicone or butyl rubber | 12 to 24 hours | Every 5 to 8 years |
| Galvanized steel | Butyl rubber or polyurethane | 24 to 72 hours | Every 3 to 7 years |
| Copper | Polyurethane or copper-compatible sealant | 24 to 72 hours | Every 8 to 12 years |
| Steel with enamel coating | Butyl rubber | 24 to 48 hours | Every 5 to 8 years |
Common Gutter Joint Sealing Mistakes to Avoid
Applying sealant to a wet gutter interior is the single most common reason a gutter joint repair fails prematurely. Water between the sealant and the gutter surface prevents any meaningful chemical bond from forming, and the repair will peel away from the joint within one to two rain events, regardless of the product used. Cleaning and drying the joint thoroughly before applying any sealant is not a preparatory step that can be skipped when time is short. It is the repair itself.
Sealing only the visible leak point without inspecting the full gutter run for additional failing joints creates a situation where the homeowner repeats the same repair multiple times on different sections of the same gutter over a single season. Any time one joint fails, adjacent joints of the same age and installation are likely near the same point of failure. A full gutter inspection and proactive resealing of all suspect joints during the same visit is more efficient and more cost-effective than reactive single-joint repairs.
Using standard interior or exterior construction caulk instead of a product specifically rated for gutter applications introduces a material that is not formulated for the thermal cycling, constant moisture exposure, and UV contact that gutter sealants must withstand. Standard caulk may appear to seal the joint initially,y but will crack, shrink, and fail within one season in most climates.
Skipping mechanical fasteners at end caps and miter joints that have physically separated is a repair that sealant alone cannot compensate for. Sealant is a waterproofing compound, not a structural adhesive. Joints that have pulled apart mechanically need pop rivets or sheet metal screws to close the gap before sealant is applied to make the joint watertight.
Applying sealant to the exterior of a lap joint instead of the interior addresses only the symptom and not the failure. Exterior sealant on a gutter seam will weather, crack, and peel within one to two years, while the interior joint continues to allow water intrusion. Interior sealing is always the correct repair approach for sectional gutter lap joints.
Gutter Joint Performance Benchmarks by Age
The expected lifespan of gutter joint sealant and the maintenance actions required shift at predictable intervals. Gutters in their first 0 to 3 years should have joints in a fully intact condition if installed correctly. Sealant failures this early typically indicate improper surface preparation at installation, a product mismatch between the sealant and gutter material, or a mechanical joint that was never properly seated before sealing.
Between 3 and 7 years, gutter joint sealant begins its natural aging process. Thermal cycling through seasonal temperature extremes gradually reduces sealant flexibility, and hairline cracks can begin to form at the highest-stress points of the joint, typically at the ends of the overlap and at the corners of end caps.
A visual inspection of all joints at the 5-year mark allows proactive resealing before active leaks develop. At 7 to 12 years, most standard butyl gutter sealants are approaching the end of their reliable service life in climates with significant seasonal temperature variation. Joints that were properly installed may still be performing, but should be inspected annually and resealed at the first sign of cracking or separation.
Between 12 and 20 years, gutter systems in this age range commonly show multiple joint failures simultaneously, and a comprehensive resealing of all joints in a single visit is more practical than addressing individual leaks reactively. The gutter bodies themselves should also be inspected for rust, holes, and sagging at this stage. Over the past 20 years, the gutters themselves, rather than just the joints, have often been the limiting factor. Full gutter replacement with seamless aluminum gutters eliminates the joint failure cycle and is frequently the most cost-effective path forward for a system in this age range with multiple failing sections.
Technology Tools Homeowners Can Use
Modern tools make gutter joint inspection and repair more efficient and more reliably completed than traditional ladder-and-caulk-gun methods. Telescoping gutter inspection cameras attach to an extendable pole and allow homeowners to visually inspect the full interior of the gutter channel from ground level, identifying joint failures, debris accumulation, and standing water zones without climbing a ladder. Cordless caulk guns with variable speed triggers provide consistent sealant flow that prevents the uneven beading and air pockets that manual guns create on longer joint runs, resulting in a more uniform and durable seal.
Gutter flushing attachments for garden hoses deliver a controlled flow of water through the full gutter length after a repair, confirming that all joints are sealed and water flows freely to the downspout before the job is considered complete. Moisture meters detect elevated moisture levels in fascia boards and soffit panels adjacent to suspect gutter joints, allowing homeowners to confirm whether water has already reached the wood structure before deciding whether joint resealing alone is sufficient or structural repairs are also needed.
Gutter guard compatibility testers, available from major gutter guard manufacturers, allow homeowners to confirm that their chosen sealant product will not react with or degrade the underside of an installed gutter protection system before applying it in a guarded gutter channel.
DIY Repair vs. Professional Repair: Know the Difference
Homeowners with basic comfort on a ladder and access to a caulk gun can safely reseal most standard gutter lap joints, end caps, and outlet collars on single-story homes. The materials are inexpensive, the process is straightforward when the preparatory steps are followed correctly, and the repair does not require specialized tools or roofing expertise. This is one of the most accessible and highest-value DIY home maintenance tasks available.
However, gutter joint repairs on two-story or multi-story homes, repairs that require working at the roof edge level on steep-pitch rooflines, replacement of mechanically failed miter or corner assemblies, and repairs combined with fascia board or soffit replacement should be handled by a licensed gutter contractor. Working at height without proper ladder stabilization and fall protection equipment is the leading cause of serious home maintenance injuries, and the savings from a DIY repair do not justify the risk when the work requires ladder positioning above single-story height.
Seek immediate professional attention if gutter joint leaks have been running against the fascia board long enough to cause visible softness or rot in the wood, if interior water staining appears on the ceiling below a gutter line suggesting water has reached the roof deck, or if the gutter has visibly separated from the fascia mounting and is pulling away from the roofline entirely. These conditions require structural assessment and repair beyond what joint resealing alone can address.
Final Thoughts
Knowing how to seal gutter joints correctly is one of the highest-return maintenance skills a homeowner can develop because the cost of the repair is measured in dollars, and the cost of ignoring it is measured in thousands. Clean the joint, dry it completely, remove the old sealant, apply the right product for the gutter material, and tool it into a bonded seal. That sequence, done once every five to ten years on a well-maintained sectional gutter system, keeps water moving where it belongs and away from every vulnerable component around it.
FAQs
1. What is the best sealant for gutter joints?
A: Butyl rubber gutter sealant is the top choice for most aluminum and steel gutters. It stays flexible, bonds reliably, and handles constant moisture exposure.
2. How long does gutter joint sealant last?
A: Properly applied butyl sealant lasts 5 to 10 years. Harsh climates with extreme temperature swings reduce that range to 3 to 7 years.
3. Can I seal gutter joints from the outside?
A: No. Always seal from the inside. Exterior sealant weathers and peels within one to two seasons and does not stop interior water intrusion.
Q: Do I need to remove old sealant before resealing?
A: Yes. Applying new sealant over old failed sealant bonds to the old material, not the gutter. Remove it fully before reapplying.
Q: When should I replace gutters instead of resealing the joints?
A: Replace when gutters are past 20 years, have multiple rust holes, or are sagging. Seamless gutters eliminate joint failure.