Water damage costs U.S. property owners $13 billion annually.
Most building failures start with one thing: improper waterproofing.
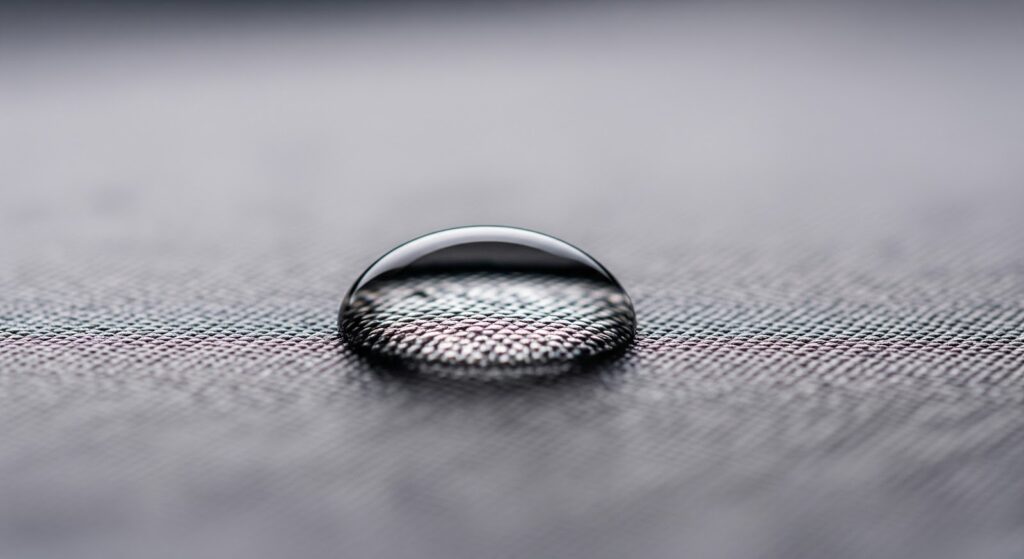
Waterproofing might not be the most glamorous part of construction, but it’s one of the most critical. A building’s strength, safety, and durability often depend on how well it keeps water out. Let’s break down the essentials you need to know.
1. What Waterproof Actually Is
Waterproofing creates a barrier between your building structure and water intrusion. It’s not just coating surfaces—it’s a complete system with three interconnected components. Each part has a specific role in keeping water out.
The system includes:
- Membrane layers – Physical barrier that blocks water
- Drainage systems – Diverts water away from structure
- Sealants – Protects joints and weak points
These work together. The membrane blocks water. Drainage diverts it. Sealants protect vulnerable areas where components meet.
2. Why Waterproof Matters (The Real Costs)
Water infiltration triggers a domino effect that impacts your building on three levels. Prevention costs a fraction of repairs, yet most skip this step. The numbers show why waterproofing should be priority one.
Structural Damage:
- Water penetration → concrete spalling
- Moisture exposure → steel corrosion
- Hydrostatic pressure → foundation cracks
Financial Impact:
- Prevention: $3-10/sq ft
- Repair: $50-150/sq ft
- 37% of insurance claims involve water damage
Health Hazards:
- Mold grows in 24-48 hours after water exposure
- Mold spores cause respiratory issues
- Creates liability exposure for property owners
Skip waterproofing now, pay 10x more later. Regular roof inspection reveals that 80% of leaks were preventable with proper waterproofing.
3. The Core Benefits (Ranked by ROI)
Every waterproofing benefit connects to your bottom line. These aren’t nice-to-haves—they’re measurable returns on investment. Here’s how each benefit delivers value.
Foundation Protection (ROI: 15:1)
Waterproofing membranes block hydrostatic pressure from groundwater. This prevents the most expensive structural repairs you’ll face.
Structural Longevity (Adds 20-30 Years)
Dry materials don’t deteriorate. Dry concrete maintains 100% compressive strength. Wet concrete loses 40% strength over time.
Energy Efficiency (Saves 30-40% on HVAC)
Moisture reduces insulation effectiveness by 50%. Waterproofing keeps insulation dry and working at full capacity.
Mold Prevention (Eliminates $20K+ Remediation)
Control moisture = control mold. No moisture means no mold growth, no remediation costs, no liability issues.
Property Value (Increases 8-12%)
Documented waterproofing systems boost appraisal values. Buyers pay premium prices for buildings with proven moisture protection.
4. Six Waterproofing Systems (And When to Use Each)
Different conditions require different systems. Your choice depends on substrate type, water exposure, and building codes. Here’s how each system performs and where it works best.
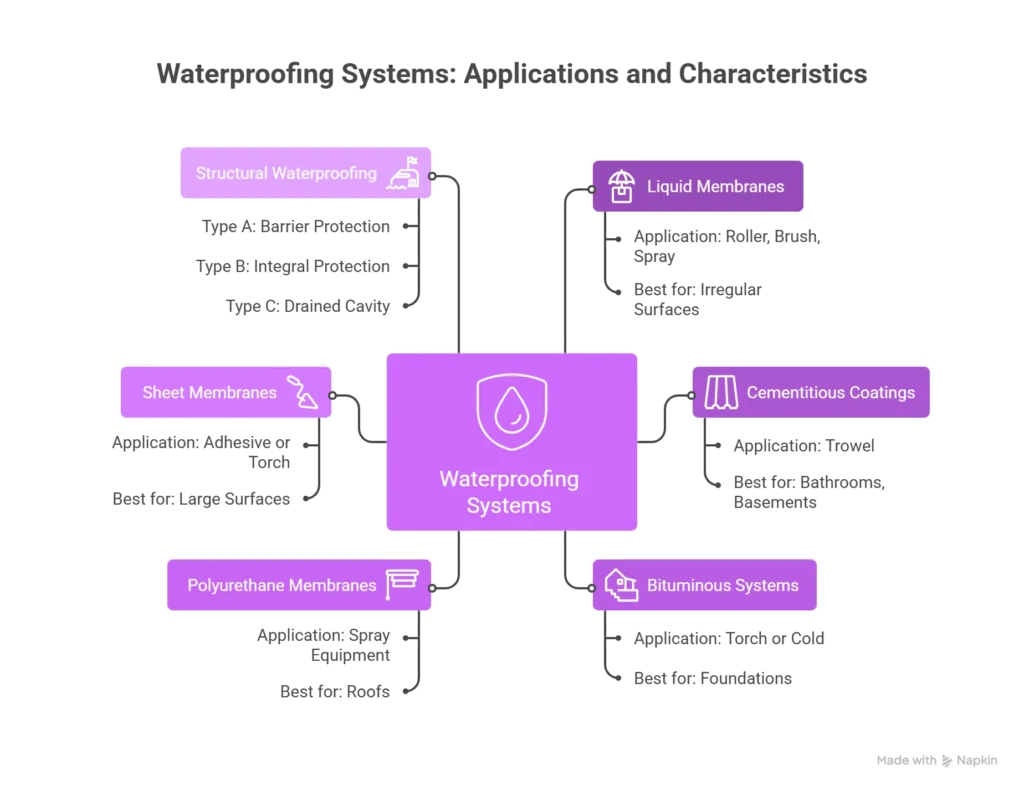
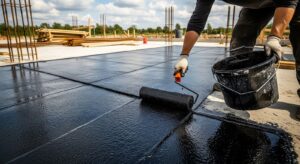
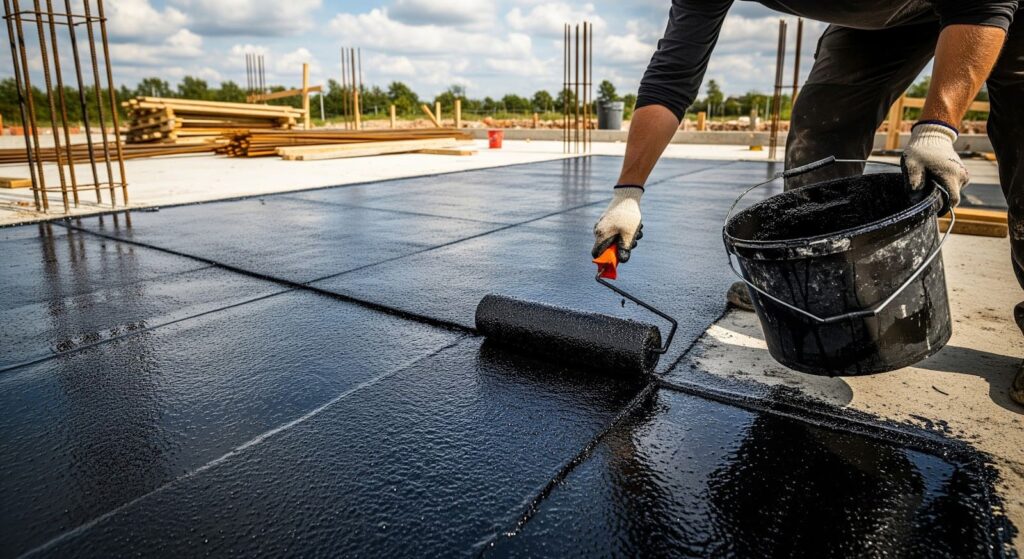
Liquid Membranes
- Application: Roller, brush, or spray
- Best for: Irregular surfaces, detail work
- Lifespan: 5-10 years
- Cost: $3-6/sq ft
Cementitious Coatings
- Application: Trowel
- Best for: Internal wet areas (bathrooms, basements)
- Lifespan: 10-15 years
- Cost: $2-4/sq ft
Bituminous Systems
- Application: Torch or cold application
- Best for: Below-grade foundations
- Lifespan: 15-25 years
- Cost: $4-7/sq ft
Polyurethane Membranes
- Application: Spray equipment
- Best for: Roofs, exposed surfaces
- Lifespan: 10-20 years
- Cost: $4-8/sq ft
Sheet Membranes
- Application: Adhesive or torch
- Best for: Large flat surfaces
- Lifespan: 20-30 years
- Cost: $5-10/sq ft
Different roofing materials require specific sheet membrane types. Match your membrane to your substrate for optimal adhesion.
Structural Waterproofing (Type A, B, C)
- Type A: Barrier protection – blocks all water entry
- Type B: Integral protection – waterproofing mixed into concrete
- Type C: Drained cavity – manages water that penetrates outer layer
5. How to Choose Your System (4-Step Process)
Choosing the right system means analyzing your conditions, not picking the cheapest option. This process eliminates guesswork and matches your needs to the optimal solution. Follow these steps in order.
Step 1: Assess Water Exposure
Low exposure (above-grade walls):
- Use cementitious coatings
- Minimal hydrostatic pressure
Medium exposure (basement walls):
- Use bituminous systems
- Moderate water pressure
High exposure (below-grade + high water table):
- Use Type A barrier + drainage
- Maximum water pressure
Step 2: Match Substrate to System
- Concrete → Cementitious, bituminous, polyurethane
- Wood → Liquid membranes, sheet membranes
- Metal → Polyurethane, specialized coatings
Step 3: Factor in Movement
- Static structures → Rigid systems (cementitious)
- Dynamic structures → Flexible systems (polyurethane, liquid membranes)
Step 4: Calculate Cost Per Year
Don’t just look at installation cost. Calculate annual cost:
Initial cost ÷ lifespan = true cost per year
Example 1: $5/sq ft system lasting 20 years = $0.25/sq ft/year
Example 2: $3/sq ft system needing recoating every 5 years = $0.60/sq ft/year
The “cheaper” system costs more than double annually.
6. Five Critical Mistakes (And How to Avoid Them)
Most waterproofing failures trace back to five mistakes during installation. These errors compound—poor prep leads to adhesion failure, which creates pinholes, which let water reach expansion joints. Here’s how to avoid each one.
Mistake #1: Poor Surface Prep
Problem: Waterproofing fails at the bond line.
Solution: Clean → Dry → Prime. Zero shortcuts.
Dirt, oil, and loose material prevent adhesion. Surface prep determines 80% of waterproofing success.
Mistake #2: Inadequate Membrane Thickness
Problem: Pinholes allow water penetration.
Solution: Apply minimum two coats perpendicular to each other. Measure wet film thickness with a gauge.
One thick coat doesn’t equal two thin coats. Cross-hatching eliminates pinholes.
Mistake #3: Ignoring Drainage
Problem: Waterproofing isn’t designed for standing water.
Solution: Install drainage systems before waterproofing. Slope all surfaces away from the building.
Understanding how roof leaks develop helps you avoid drainage mistakes. Most leaks start where water pools.
Mistake #4: Wrong Product for the Job
Problem: Incompatible materials cause delamination.
Solution: Check manufacturer compatibility charts. Test on small areas first.
Some primers prevent adhesion. Some solvents dissolve membranes. Verify compatibility before full application.
Mistake #5: Skipping Expansion Joints
Problem: Building movement cracks rigid waterproofing.
Solution: Use flexible sealants at all joints. Allow for 25% compression and extension.
Buildings expand and contract daily. Rigid waterproofing over joints will crack.
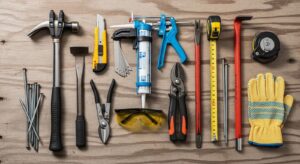
7. Application Method (The Right Way)
Proper application determines whether you get 20-year protection or 2-year failure. Each step builds on the previous one. Skip one step, compromise the entire system. Here’s the proven foundation waterproofing process.
Day 1: Excavation & Prep
- Expose foundation walls completely
- Remove all debris and loose concrete
- Fill cracks with hydraulic cement
- Let repairs cure 24 hours
Day 1-2: Priming
- Apply concrete primer per manufacturer specs
- Ensure complete coverage
- Let cure fully before next step
Day 2-3: First Coat
- Apply vertically from bottom to top
- Maintain consistent thickness throughout
- Extend 6 inches above grade
- Check for pinholes and missed spots
Day 3-4: Second Coat
- Apply horizontally (perpendicular to first coat)
- Cover 100% of surface
- Detail all corners and penetrations
- Apply extra thickness at vulnerable points
Day 4-5: Protection & Drainage
- Install drainage board over membrane
- Place perimeter drain at footing level
- Backfill carefully without damaging membrane
- Grade soil away from foundation
8. Maintenance Schedule (By System Type)
Maintenance timing connects directly to system type and exposure level. More exposure means more frequent maintenance. Regular inspections catch small issues before they become $50,000 disasters. Follow this schedule based on your waterproofing system.
Annual Inspection (All Systems)
- Visual check for cracks, blistering, or damage
- Test drainage systems for proper flow
- Document conditions with photos
- Address small issues immediately
Every 3-5 Years (Exposed Systems)
- High-traffic areas
- Roof waterproofing coatings
- Balcony and deck surfaces
- Parking structures
Every 5-10 Years (Protected Systems)
- Foundation membranes with drainage boards
- Below-grade applications
- Interior basement waterproofing
Every 10-15 Years (Premium Systems)
- Sheet membranes
- Polyurethane systems
- Type A structural waterproofing
Proper metal roof maintenance and winter ice dam prevention protect your waterproofing investment year-round.
9. Real Cost Breakdown (2025 Numbers)
Cost and value in waterproofing work exponentially—spend more upfront, save multiples later. These 2025 numbers show real project costs. Use them to calculate your specific ROI.
Material Costs
- Entry level: $2-4/sq ft (cementitious)
- Mid-range: $4-7/sq ft (bituminous, liquid membranes)
- Premium: $7-12/sq ft (polyurethane, sheet membranes)
Labor Costs
- Simple application: $2-4/sq ft
- Complex details: $5-8/sq ft
- Difficult access: $8-15/sq ft
Project Size Impact
- Under 500 sq ft: +30% premium
- 500-2,000 sq ft: Standard rates
- Over 2,000 sq ft: 15-25% discount
Total Project Examples
- 1,000 sq ft basement: $6,000-$12,000
- 2,500 sq ft foundation: $12,500-$25,000
- 3,000 sq ft flat roof: $15,000-$36,000
ROI Calculation
- Average water damage repair: $45,000
- Average waterproofing cost: $15,000
- Net savings: $30,000 (200% ROI on first incident)
Prevent one major water event and you’ve paid for waterproofing three times over.
FAQs
How long does waterproofing last?
10-25 years depending on system and exposure. Liquid membranes last 5-10 years. Sheet membranes last 20-30 years. Premium systems with proper maintenance can exceed 30 years.
What’s the best waterproofing for basements?
Exterior: Bituminous membrane plus drainage system. Interior: Crystalline waterproofing for existing homes. Best protection: Use both exterior and interior systems.
Does waterproofing prevent mold?
Yes. Mold needs moisture to grow. Remove moisture, eliminate mold. Waterproofing plus ventilation creates an environment where mold cannot survive.
Is DIY waterproofing worth it?
For small projects (bathrooms, minor repairs): Yes. For structural work (foundations, below-grade): No. Professional installation costs less than fixing failed DIY attempts.
How often should you reapply waterproofing?
Exposed surfaces: Every 5-7 years. Protected surfaces: Every 15-20 years. Always inspect annually and reapply when you see deterioration, not after failure.
What’s the environmental impact?
Modern water-based systems produce minimal VOCs. Preventing water damage reduces construction waste. Proper waterproofing is net positive for the environment.
The Bottom Line
Waterproofing is a system, not a product.
Membranes, drainage, and sealants work together. Choose the right system for your conditions. Apply it correctly. Maintain it regularly.
Do this, and you’ll avoid the $13 billion other property owners pay annually for preventable water damage.