
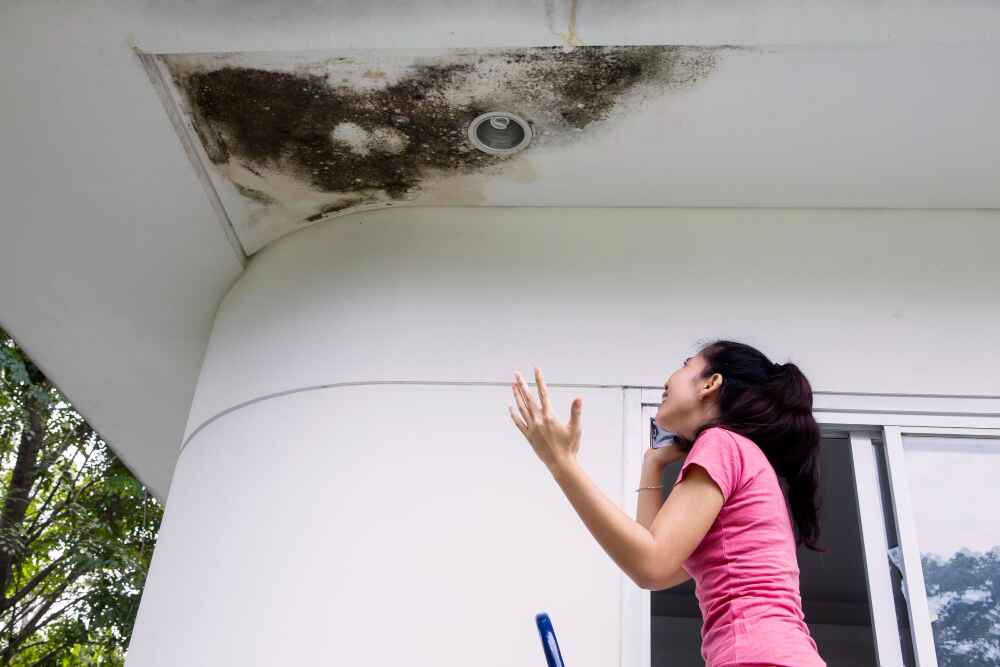
The good news? Learning how to repair hole in roof doesn’t always require calling in expensive contractors. Many roof repairs are well within the reach of confident DIY homeowners, and addressing the problem quickly can save you from extensive water damage, mold growth, and structural issues down the line.
In this comprehensive guide, we’ll walk you through everything you need to know about identifying, assessing, and repairing roof holes of various sizes. From emergency temporary fixes to permanent solutions, you’ll have the knowledge and confidence to tackle this critical home maintenance task safely and effectively.
Understanding Different Types of Roof Holes and Their Causes
Before diving into repair methods, it’s crucial to understand what you’re dealing with. Roof holes can vary dramatically in size, location, and underlying cause, which directly impacts your repair approach.
Small punctures typically result from hail damage, falling branches, or deteriorated flashing around vents and chimneys. These holes might be barely visible from ground level but can cause significant water infiltration over time.
Medium-sized holes often occur when larger debris impacts the roof during storms, or when roofing materials fail due to age and weather exposure.
Large holes usually indicate severe storm damage, structural failure, or long-term neglect that has allowed small problems to escalate.
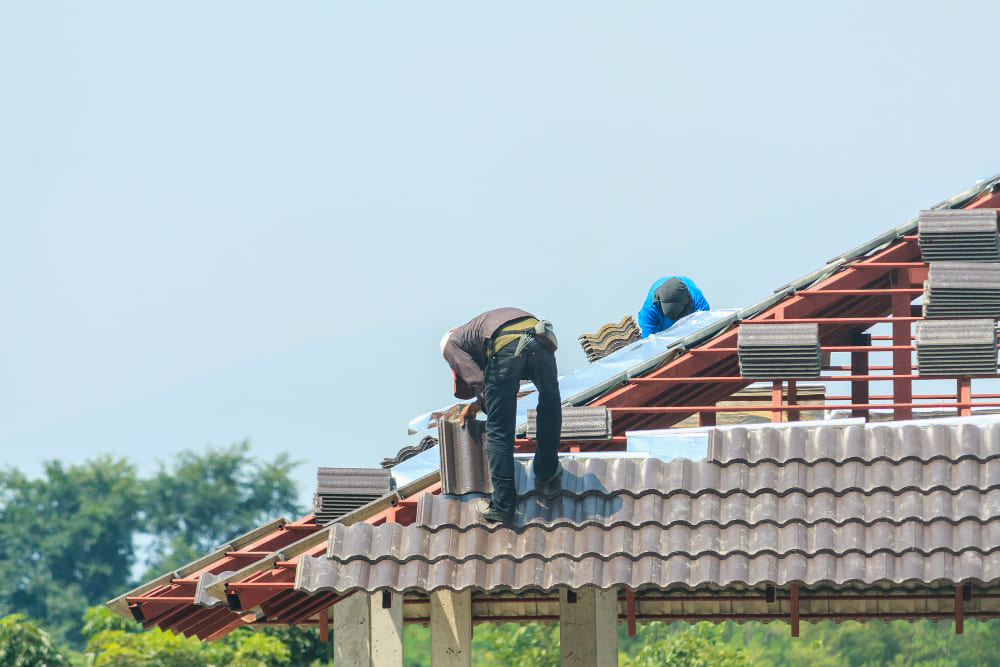
The roofing material itself also influences repair complexity. Asphalt shingles, the most common residential roofing material, are relatively straightforward to work with and replace. Metal roofing requires different techniques and materials, while tile and slate roofs demand specialized knowledge and tools. Understanding your specific roofing system helps determine whether you can tackle the repair yourself or need professional assistance.
Weather conditions and seasonal factors play a significant role in both hole formation and repair timing. Winter freeze-thaw cycles can expand existing cracks, while summer heat can make roofing materials more pliable and easier to work with. However, extreme temperatures in either direction can make repairs more challenging and potentially dangerous.
Essential Tools and Materials for Roof Hole Repair

Success in roof repair starts with having the right tools and materials on hand. For basic repairs, you’ll need a sturdy ladder rated for your weight plus materials, safety equipment including non-slip shoes and a safety harness, and basic hand tools like a hammer, utility knife, and pry bar.
Roofing-specific materials vary by repair type but commonly include replacement shingles that match your existing roof, roofing cement or sealant, roofing nails (typically 1¼ to 1½ inches for shingles), and flashing material if working around roof penetrations. For temporary repairs, heavy-duty tarps, roofing tape, and emergency patch kits can provide crucial protection while you plan permanent solutions.
Roofing safety guidelines cannot be overlooked. A properly fitted safety harness, non-slip shoes with good tread, work gloves, and safety glasses are essential minimums. Consider renting or purchasing roof anchors and safety lines for more extensive repairs. Never attempt roof work alone – having a helper on the ground can be crucial for both safety and efficiency.
Quality matters when selecting materials. While it might be tempting to choose the cheapest options, using high-quality roofing materials ensures longer-lasting repairs and better protection for your home. Match shingle colors and styles as closely as possible to maintain your roof’s appearance and potentially preserve home value.
How to Repair Small Hole in Roof: Quick Fixes for Minor Damage
When dealing with minor roof damage, acting quickly can prevent small problems from becoming major repairs. Small holes, typically less than an inch in diameter, are often the easiest to address and can usually be handled with basic DIY skills and common roofing materials.
Assessment is critical before beginning any repair. Examine the hole from both inside and outside your home if possible. Look for signs of water damage, rotted decking, or compromised structural elements. If you discover extensive damage beyond the visible hole, professional consultation may be necessary.
For small punctures in asphalt shingles, the repair process is relatively straightforward. Clean debris from around the damaged area, ensuring the surface is dry before applying any sealants. Apply roofing cement generously around and over the hole, extending coverage at least two inches beyond the damaged area in all directions. Press firmly to ensure good adhesion and create a watertight seal.
Shingle replacement becomes necessary when the hole is too large for simple patching or when surrounding material is compromised. Carefully lift the shingle above the damaged one, remove nails holding the damaged shingle in place, and slide the new shingle into position. Secure with roofing nails placed in the manufacturer-recommended locations, typically just above the adhesive strip.
Weather timing significantly impacts repair success. Avoid working on wet or icy roofs, and plan repairs during mild weather when materials will adhere properly. Hot summer days can make shingles more pliable and easier to work with, but be cautious of surface temperatures that could cause burns.
Step-by-Step Guide: How to Repair Hole in Roof Shingles
Repairing damaged shingles requires systematic approach and attention to detail. The process varies slightly depending on shingle type and damage extent, but following proper procedures ensures lasting repairs that protect your home effectively.
Preparation phase involves gathering all necessary materials and tools, checking weather conditions, and ensuring you have adequate help and safety equipment. Inspect the damaged area thoroughly, taking photos for reference and to track repair progress over time.
Begin by carefully removing damaged materials. Use a pry bar to lift surrounding shingles gently, avoiding damage to undamaged areas. Remove all nails from the damaged shingle, keeping track of nail locations for proper replacement positioning. Clean debris from the exposed decking, checking for signs of rot or structural damage that might require additional attention.
Installing replacement shingles requires precision and proper technique. Position the new shingle to align with surrounding materials, ensuring proper overlap and exposure. Nail placement is critical – too high and the shingle may blow off in wind, too low and you risk creating leak points. Most asphalt shingles require four to six nails, positioned according to manufacturer specifications.
Sealing and finishing steps ensure long-term performance. Apply roofing cement under the edges of overlapping shingles, press firmly to create good adhesion, and check that all nail heads are properly sealed. Clean excess sealant and inspect the repair area for any gaps or potential leak points.
Quality control shouldn’t be overlooked. Step back and examine your work from multiple angles, ensuring the repair blends seamlessly with surrounding roofing materials. Take photos of completed work for future reference and warranty documentation.
Emergency Temporary Repairs: Protecting Your Home Until Permanent Fixes
Sometimes roof damage occurs at the worst possible times – during storms, holidays, or when professional help isn’t immediately available. Knowing how to implement effective temporary repairs can prevent extensive water damage and buy you valuable time to arrange permanent solutions.
Immediate damage control starts with containing interior water infiltration. Place buckets or tarps to catch dripping water, and remove valuable items from affected areas. If water is actively entering your home, addressing the immediate threat takes priority over perfect repair techniques.
Tarp installation provides excellent temporary protection for larger damaged areas. Choose heavy-duty tarps rated for outdoor use, and ensure adequate size to extend well beyond the damaged area. Secure tarps using sandbags, lumber, or temporary anchors, avoiding methods that create additional penetrations in your roof.
For smaller holes, emergency patch kits offer quick solutions. These typically include adhesive patches designed to bond directly to various roofing materials. Clean the damaged area as thoroughly as possible, apply the patch according to manufacturer instructions, and seal edges with appropriate sealant or tape.
Roofing cement can provide temporary waterproofing for various hole sizes. Apply generously around and over damaged areas, creating a mounded profile that encourages water runoff. While not aesthetically pleasing, this method can provide effective protection until permanent repairs are possible.
Remember that temporary repairs are exactly that – temporary. Plan for permanent solutions as soon as conditions and resources allow. Document temporary repairs with photos and notes to help professionals understand what work has been done when you’re ready for permanent fixes.
When to Call Professionals vs. DIY Repairs
Determining whether to tackle roof repairs yourself or call professionals involves honest assessment of damage extent, your skill level, available time, and safety considerations. Making the wrong choice can result in inadequate repairs, safety injuries, or voided insurance coverage.
DIY-appropriate repairs typically include small holes in accessible areas, individual shingle replacement, minor flashing repairs, and situations where you have appropriate tools, skills, and safety equipment. If you’re comfortable working at heights, have basic construction skills, and can safely access the damaged area, many roof repairs are within DIY capabilities.
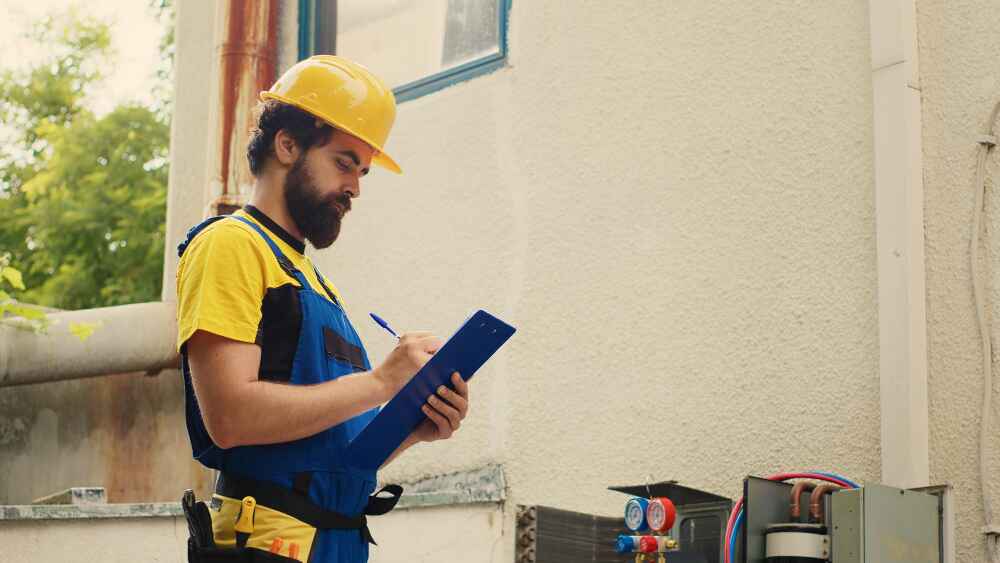
Professional intervention becomes necessary for extensive damage, structural issues, work on steep or high roofs, or when dealing with complex roofing systems like tile, slate, or metal. Insurance considerations also play a role – some policies require professional repairs to maintain coverage, while others offer better coverage for professionally completed work.
Safety factors should never be compromised. If you’re uncomfortable with heights, lack proper safety equipment, or have any health conditions that might affect your ability to work safely on a roof, professional help is worth the investment. The cost of professional repairs is always less than medical bills from preventable injuries.
Time and complexity considerations matter too. While DIY repairs can save money, they often take significantly longer than professional work. If you’re dealing with active leaks or rapidly deteriorating conditions, professional repairs might be more cost-effective in the long run.
Warranty and insurance implications vary by provider and policy. Some insurance companies prefer professional repairs for claims processing, while others are comfortable with quality DIY work. Check with your insurance provider before beginning major repairs to understand coverage implications.
Preventing Future Roof Holes: Maintenance Tips and Best Practices
Prevention remains the most cost-effective approach to roof hole management. Regular maintenance, timely repairs, and proactive protection measures can significantly extend your roof’s lifespan and reduce the likelihood of emergency repairs.
For more detailed types of roof material maintenance tips, regular inspection schedules should include visual checks from ground level monthly, more detailed inspections twice yearly (spring and fall), and professional assessments every few years depending on roof age and local weather conditions. Document findings with photos and notes to track changes over time.
Seasonal maintenance tasks vary by climate but typically include cleaning gutters and downspouts, trimming overhanging tree branches, removing debris buildup, and checking flashing around chimneys, vents, and other roof penetrations. Address minor issues promptly before they develop into major problems.
Weather-related precautions can prevent many types of roof damage. Secure loose items that might become projectiles during storms, consider impact-resistant roofing materials in hail-prone areas, and ensure adequate attic ventilation to prevent ice dam formation in cold climates.
Professional relationships prove valuable for major maintenance and emergency situations. Establish connections with reputable local roofing contractors before you need emergency services. Many contractors offer maintenance programs that include regular inspections and priority service for customers.
Documentation practices support both maintenance efforts and potential insurance claims. Maintain records of all roof work, including photos, receipts, warranty information, and contractor details. This documentation proves valuable for warranty claims, insurance purposes, and future repair planning.
Cost Analysis: DIY vs. Professional Roof Hole Repairs
Understanding repair costs helps make informed decisions about DIY versus professional repairs. Cost factors include materials, tools, time investment, and potential long-term implications of repair quality.
DIY cost components typically include materials (shingles, nails, sealants, safety equipment), tool purchases or rentals, and your time investment. For small repairs, material costs might range from $20-100, while larger repairs could require $200-500 in materials. Factor in tool costs if you don’t already own necessary equipment.
Professional repair costs vary significantly by location, damage extent, and contractor expertise. Simple shingle repairs might cost $150-400, while more extensive work could range from $500-2000 or more. Emergency repairs typically carry premium pricing, emphasizing the value of preventive maintenance.
Hidden costs can impact both DIY and professional repairs. Poor DIY work might require professional correction, potentially costing more than initial professional repairs. Conversely, choosing low-quality contractors might result in callbacks and warranty issues.
Long-term value considerations include repair longevity, warranty coverage, and impact on home value. Professional repairs often include warranties and may be viewed more favorably by potential home buyers. However, quality DIY work using proper materials and techniques can provide excellent long-term value.
Insurance implications affect overall cost calculations. Some policies offer better coverage for professional repairs, while others are indifferent to repair method as long as work meets standards. Consult your insurance provider to understand policy specifics.
Frequently Asked Questions About Roof Hole Repairs
How quickly should I repair a hole in my roof? Address roof holes immediately, even if only with temporary measures. Water damage can begin within hours of initial infiltration, and delays often result in exponentially higher repair costs. Even small holes can allow significant water entry during heavy rain or snow melt.
Can I repair roof holes during winter? Winter repairs are possible but challenging. Cold temperatures affect material adhesion and worker safety. If emergency repairs are necessary, focus on temporary weatherproofing measures and plan permanent repairs for spring. Some roofing materials become brittle in cold weather, making installation more difficult.
What’s the difference between patching and replacing damaged shingles? Patching involves applying sealants or patch materials over existing damaged shingles, suitable for small holes or minor damage. Replacement involves removing damaged shingles entirely and installing new materials, necessary for extensive damage or when patches would be inadequate or unsightly.
How can I tell if roof decking is damaged? Signs of decking damage include sagging areas, visible rot or discoloration, soft spots when walking on the roof, and daylight visible through the roof structure from inside the attic. Decking damage typically requires professional assessment and repair.
What tools do I absolutely need for basic roof hole repair? Essential tools include a sturdy ladder, safety equipment (harness, non-slip shoes), hammer, utility knife, pry bar, measuring tape, and basic hand tools. Material needs vary by repair type but commonly include replacement shingles, roofing nails, and sealant.
How do I match replacement shingles to existing roof materials? Take a sample of your existing shingle to roofing supply stores for color and style matching. Photos can help, but physical samples provide the most accurate matching. Consider that weathered shingles may not match new materials exactly, but close matches are usually acceptable.
Are there any roof hole repairs I should never attempt myself? Avoid DIY repairs on steep roofs, extensive structural damage, electrical hazards near roof penetrations, or when you lack proper safety equipment. Also avoid repairs during dangerous weather conditions or if you’re uncomfortable working at heights.
Advanced Repair Techniques for Complex Roof Damage
Some roof hole situations require more sophisticated repair approaches than basic patching or shingle replacement. Understanding these techniques helps determine when professional help is necessary and what to expect from advanced repair processes.
Flashing repairs around chimneys, vents, and roof valleys require specialized flashing installation techniques and materials. Damaged flashing often contributes to hole formation and must be addressed as part of comprehensive repairs. This work typically involves removing roofing materials around the flashing, installing new flashing with proper overlap and sealing, and reinstalling roofing materials with careful attention to water flow patterns.
Structural repairs become necessary when roof holes result from or cause damage to underlying decking or framing. These repairs might involve removing larger sections of roofing material, replacing damaged decking, and ensuring proper structural integrity before installing new roofing materials. Such work typically requires professional expertise and may need building permits.
Multi-layer roofing systems present unique challenges when holes penetrate multiple layers. Repairs must address each layer appropriately while maintaining the system’s overall integrity. This often requires understanding how different materials interact and ensuring compatibility between old and new materials.
Preventive reinforcement techniques can strengthen repaired areas and reduce future damage likelihood. This might include adding additional fasteners, upgrading to impact-resistant materials, or installing protective barriers in vulnerable areas.
Conclusion: Take Action to Protect Your Home Today
Learning how to repair hole in roof empowers you to protect one of your most significant investments – your home. Whether you’re dealing with a small puncture from recent hail damage or planning ahead for future maintenance needs, having the knowledge and confidence to address roof holes quickly and effectively can save thousands of dollars in water damage and structural repairs.
The key takeaways from this comprehensive guide emphasize the importance of quick action, proper assessment, and choosing appropriate repair methods for each situation. Small holes can often be successfully repaired with basic DIY skills and common materials, while larger or more complex damage may require professional intervention. Remember that temporary repairs can provide crucial protection while you arrange permanent solutions, but they should never be considered long-term fixes.
Safety should never be compromised in pursuit of cost savings. If you’re uncomfortable working at heights, lack proper equipment, or are dealing with extensive damage, professional roofing contractors provide expertise, proper tools, and warranty protection that often justify their cost.
Don’t wait for small problems to become major disasters. Inspect your roof regularly, address minor issues promptly, and maintain relationships with qualified professionals for situations beyond your comfort level. Your proactive approach to roof maintenance and repair will pay dividends in extended roof life, prevented water damage, and peace of mind during severe weather.
Ready to tackle that roof hole that’s been worrying you? Start with a thorough assessment, gather the proper materials and safety equipment, and remember that asking for professional help when needed is a sign of wisdom, not weakness. Your home – and your family’s safety – are worth the investment in proper roof maintenance and repair.
Take action today, and transform that source of stress into a successfully completed home improvement project that protects your investment for years to come.