Every year, thousands of RV owners face the nightmare of roof leaks that could have been prevented with proper maintenance. Your RV’s rubber roof isn’t just a protective barrier—it’s your home’s shield against Mother Nature’s worst tantrums. And here’s the thing: with the right knowledge and a little elbow grease, you can keep that shield strong for decades.
Whether you’re a weekend warrior or a full-time nomad, this comprehensive guide will transform you from a roof maintenance rookie into a confident caretaker of your travel trailer’s most critical component. We’ll dive deep into everything from emergency repairs to seasonal care routines that’ll save you thousands in the long run.
Why RV Rubber Roof Maintenance Should Be Your Top Priority
Before we roll up our sleeves, let’s talk about why rv rubber roof maintenance deserves a spot at the top of your RV care checklist. Your rubber roof faces an incredible amount of punishment every single day—scorching UV rays, hail storms, tree branches, and temperature swings that would make a thermometer dizzy.
Most RV roofs are made from either EPDM (ethylene propylene diene monomer) or TPO (thermoplastic polyolefin) rubber. These materials are incredibly durable when properly maintained, but they’re not invincible. A small crack or worn seam can quickly turn into a major disaster that affects your RV’s structural integrity, electrical systems, and interior comfort.
The statistics are sobering: roof-related water damage accounts for nearly 40% of all RV insurance claims. But here’s the good news—almost all of these issues are preventable with regular camper roof maintenance and timely repairs.
Unlike traditional residential roofing materials, explore our complete guide on roofing materials and maintenance. RV rubber roofs require specialized care due to their mobile nature and constant exposure to varying weather conditions.
Understanding Your RV’s Rubber Roof System
The Anatomy of Protection
Your RV’s rubber roof system is more complex than you might think. It’s not just a single sheet of rubber stretched over your rig—it’s a carefully engineered system designed to keep you dry and comfortable.
The primary membrane is typically a single piece of rubber that covers the entire roof surface. This membrane is adhered to the roof deck using specialized adhesives and mechanical fasteners. Around the edges, you’ll find termination strips that secure the membrane to the sidewalls.
But the real magic happens in the details. Every roof penetration—from air conditioners to plumbing vents—requires careful sealing with compatible sealants. These seals are often the first line of defense against water intrusion, making them critical components of your travel trailer roof maintenance routine.
Common Roof Materials and Their Characteristics
EPDM Rubber Roofs: These black rubber roofs are incredibly popular in the RV industry due to their excellent weather resistance and flexibility. EPDM (ethylene propylene diene monomer) roofs can expand and contract with temperature changes without cracking, making them ideal for the mobile lifestyle.
TPO Rubber Roofs: Usually white or light-colored, TPO roofs offer superior UV resistance and energy efficiency. They’re becoming increasingly popular in newer RVs due to their ability to reflect heat and keep your interior cooler.
Both materials require specific care products and techniques, so identifying your roof type is the first step in developing an effective maintenance routine.
Essential Tools and Products for RV Roof Care
Your Maintenance Arsenal
Success in rv roof maintenance starts with having the right tools and products at your disposal. Here’s what every RV owner should have in their maintenance toolkit:
Cleaning Supplies:
- Soft-bristle brush with extended handle
- Non-abrasive cleaning solution (avoid harsh chemicals)
- Microfiber cloths and clean rags
- Garden hose with adjustable spray nozzle
- Rubber roof cleaner is specifically designed for your membrane type
You can visit our Roof cleaning chemicals blog post for more information.
Inspection and Repair Tools:
- Flashlight or headlamp for detailed inspections
- Caulk gun for sealant application
- Putty knife for removing old sealant
- Measuring tape for assessing damage
- Camera for documenting issues
Sealants and Repair Materials:
- Lap sealant for horizontal surfaces
- Butyl tape for permanent seals
- Eternabond tape for emergency repairs
- Rubber roof conditioner or treatment
- Replacement weatherstripping
Choosing the Right Products
Not all roof care products are created equal. Using the wrong cleaner or sealant can actually damage your roof membrane, leading to premature failure. Always check your RV manufacturer’s recommendations and choose products specifically designed for your roof material.
For EPDM roofs, avoid petroleum-based products that can cause swelling and deterioration. TPO roofs are more chemical-resistant but still benefit from gentle, pH-neutral cleaners.
Step-by-Step RV Rubber Roof Maintenance Process
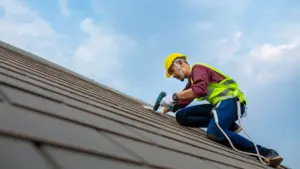
Pre-Inspection Safety Protocol
Before you even think about climbing onto your RV roof, safety must be your top priority. Here’s your pre-maintenance checklist:
Safety First:
- Check weather conditions (never work on a wet or icy roof)
- Ensure your RV is level and stable
- Use a sturdy ladder with proper support
- Wear non-slip shoes with good grip
- Have someone spot you if possible
- Keep your phone accessible for emergencies
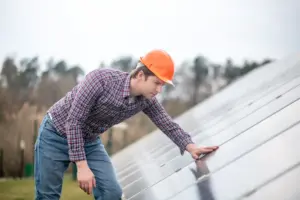
The Monthly Visual Inspection
Regular inspections are the cornerstone of effective camper roof maintenance. Schedule these monthly checks to catch issues before they become expensive problems.
What to Look For:
- Cracks, tears, or punctures in the membrane
- Separated seams or loose edges
- Damaged or missing sealant around penetrations
- Pooling water or soft spots
- Excessive dirt or debris accumulation
- Signs of UV damage (chalking, fading, or brittleness)
Start at one corner of your roof and work systematically across the entire surface. Pay special attention to areas around roof accessories, where most leaks originate.
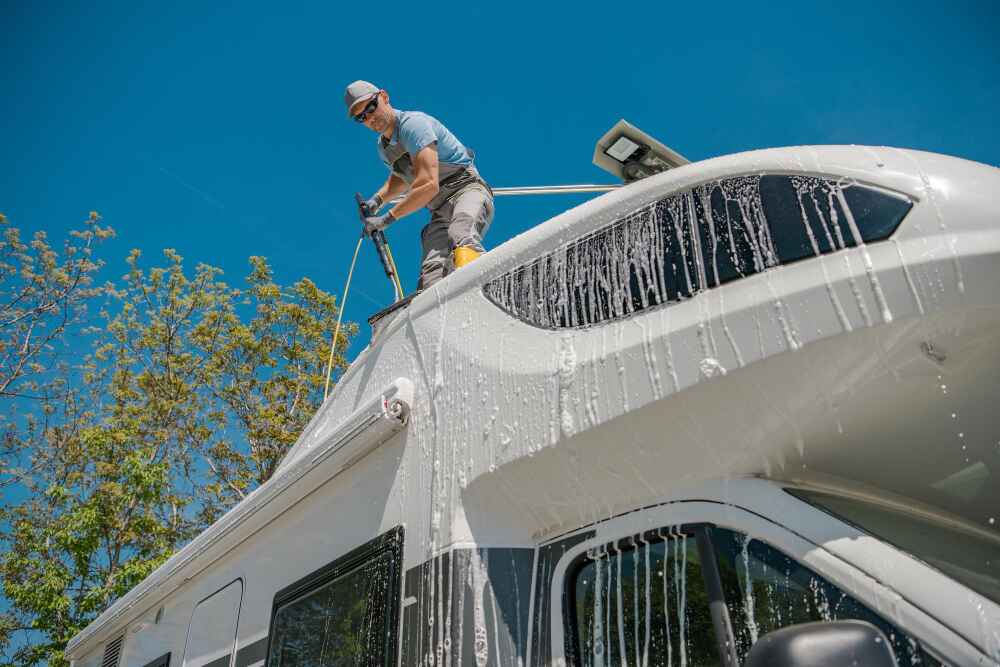
Deep Cleaning Your Rubber Roof
The Proper Cleaning Sequence:
Remove Debris: Clear away leaves, twigs, and other debris that might scratch the membrane during cleaning.
Initial Rinse: Use a garden hose to wet the entire roof surface, working from the highest point downward.
Apply Cleaning Solution: Use a rubber roof cleaner mixed according to manufacturer instructions. Apply with a soft brush, working in small sections.
Gentle Scrubbing: Work the cleaner into the membrane using circular motions. Never use excessive pressure that could damage the rubber.
Thorough Rinse: Remove all cleaning solution with clean water, ensuring no residue remains.
Dry Completely: Allow the roof to air dry completely before applying any treatments or sealants.
Sealant Inspection and Replacement
Sealants are your roof’s weak points, requiring regular attention as part of your rv roof care routine. Most RV sealants need replacement every 1-3 years, depending on climate and exposure conditions.
Common Sealant Locations:
- Around air conditioning units
- Vent fan housings
- Antenna mounts
- Plumbing vents
- Roof edge terminations
- Sidewall joints
Signs It’s Time for Replacement:
- Cracking or shrinking sealant
- Separation from the roof surface
- Hardening or brittleness
- Discoloration or chalking
- Visible gaps or holes
Advanced Rubber Roof Treatment and Conditioning
Why Your Roof Needs Regular Conditioning
Just like your skin needs moisturizer, your RV’s rubber roof benefits from regular conditioning treatments. Camper rubber roof treatment products help maintain flexibility, prevent cracking, and extend the life of your membrane.
UV radiation is particularly damaging to rubber roofs, causing oxidation that leads to chalking and eventual failure. Quality roof conditioners contain UV inhibitors that create a protective barrier against these harmful rays.
Application Techniques for Maximum Effectiveness
Timing is Everything: Apply roof treatments during moderate temperatures (60-80°F) and avoid direct sunlight when possible. Early morning or late afternoon applications typically yield the best results.
The Application Process:
- Clean the roof thoroughly and allow it to dry completely
- Apply conditioner in thin, even coats using a microfiber cloth or foam applicator
- Work in small sections to ensure complete coverage
- Allow proper curing time before exposing to weather
- Reapply according to manufacturer recommendations
Seasonal Treatment Schedules
Spring Preparation: After winter storage, conduct a thorough inspection and apply conditioner to address any UV damage from the previous season.
Summer Maintenance: Monitor your roof monthly during peak sun exposure. Consider additional treatments in extremely hot climates.
Fall Protection: Prepare your roof for winter weather with a final conditioning treatment and comprehensive seal check.
Winter Care: While conditioning isn’t typically needed during winter, continue monthly inspections for ice damage or debris accumulation.
Troubleshooting Common Roof Problems
Emergency Leak Repairs
When disaster strikes and you discover a leak, quick action can prevent extensive damage. Here’s your emergency response plan:
Immediate Steps:
- Locate and contain the leak from inside your RV
- Move belongings away from the affected area
- Place buckets or containers to catch dripping water
- Document the damage with photos for insurance purposes
- Plan your temporary repair strategy
Temporary Repair Solutions:
- Eternabond tape for small punctures or tears
- Butyl tape for loose seams
- Lap sealant for gap filling
- Tarp coverage for large damaged areas
Remember, these are temporary solutions. Professional repairs should be completed as soon as possible to prevent further damage.
Dealing with Ponding Water
Standing water on your RV roof isn’t just unsightly—it’s a serious problem that can lead to membrane failure and structural damage. Most RV roofs have a slight slope designed to promote drainage, but sometimes water still collects in low spots.
Causes of Ponding Water:
- Settling of the RV structure over time
- Improper installation or repairs
- Clogged drains or gutters
- Excessive weight on the roof
- Structural damage affecting roof pitch
Solutions:
- Improve drainage with additional drains or scuppers
- Adjust roof pitch if structurally feasible
- Regular removal of standing water
- Professional structural assessment for severe cases
Addressing UV Damage and Oxidation
UV damage appears as chalking, fading, or a powdery residue on your roof surface. While some oxidation is normal, excessive damage can compromise your roof’s integrity.
Prevention Strategies:
- Regular conditioning treatments
- Covered storage when possible
- Quality UV-resistant sealants
- Prompt repair of minor damage
Seasonal RV Roof Maintenance Schedules
Spring Awakening: Post-Winter Roof Revival
Spring is the perfect time for a comprehensive travel trailer roof maintenance overhaul. After months of winter weather, your roof needs attention to prepare for the active camping season ahead.
Spring Maintenance Checklist:
- Comprehensive leak inspection after winter weather
- Deep cleaning to remove winter debris and contaminants
- Sealant inspection and replacement as needed
- Conditioning treatment to restore flexibility
- Drainage system check and cleaning
- Documentation of any damage for repair planning
Summer Vigilance: Protecting Against Heat and UV
Summer brings intense UV radiation and extreme temperatures that can accelerate roof aging. Your maintenance routine should focus on protection and monitoring.
Summer Care Priorities:
- Monthly inspections for UV damage
- Immediate removal of tree sap and debris
- Monitoring for thermal expansion issues
- Checking air conditioning unit seals
- Ensuring adequate ventilation to prevent heat buildup
Fall Preparation: Winterization and Protection
Fall maintenance prepares your roof for winter’s challenges while addressing any damage from the active camping season.
Fall Preparation Tasks:
- Final comprehensive inspection before winter
- Repair any damage discovered during summer use
- Apply protective conditioning treatment
- Secure all roof accessories and penetrations
- Clean and inspect drainage systems
- Document roof condition for spring reference
Winter Monitoring: Minimal but Essential Care
While winter typically requires less active maintenance, you shouldn’t completely ignore your roof during the cold months.
Winter Considerations:
- Monthly visual inspections for ice damage
- Snow load monitoring and removal if excessive
- Checking for pest damage or intrusion
- Ensuring proper ventilation to prevent condensation
- Planning spring maintenance and repairs
Professional vs. DIY Maintenance: Making the Right Choice
When to Call the Professionals
While most rv rubber roof maintenance tasks can be handled by dedicated DIY enthusiasts, some situations require professional expertise:
Complex Repairs: Large tears, structural damage, or multiple leak sources often require professional assessment and repair.
Warranty Considerations: Some repairs must be performed by certified technicians to maintain warranty coverage.
Safety Concerns: If you’re uncomfortable working on your roof or lack proper safety equipment, professional service is the wise choice.
Time Constraints: Professional maintenance might be more cost-effective if you value your time or lack the tools for proper repairs.
Cost-Benefit Analysis
DIY Maintenance Costs:
- Initial tool and product investment: $200-500
- Annual maintenance supplies: $100-200
- Time investment: 20-30 hours per year
Professional Maintenance Costs:
- Annual inspection and maintenance: $300-600
- Major repairs: $500-2000+
- Complete roof replacement: $3000-8000+
The numbers clearly show that DIY maintenance pays for itself quickly while giving you better control over your RV’s condition.
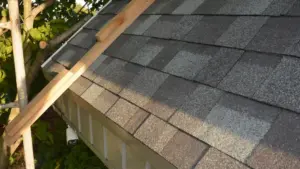
Roof Material Comparison: Understanding Your Options
While rubber roofs dominate the RV market, understanding your options helps you make informed decisions about maintenance and potential upgrades. Unlike residential roofing where you might choose from various materials (as detailed in our best roof shingles guide), RV roofs have more limited but specialized options.
EPDM vs. TPO: The Rubber Roof Showdown
EPDM Advantages:
- Excellent flexibility and durability
- Lower initial cost
- Easy to repair
- Proven track record in RV applications
TPO Advantages:
- Superior UV resistance
- Energy efficiency benefits
- Longer lifespan potential
- Better appearance retention
Maintenance Differences
Each material requires slightly different care approaches:
EPDM Care: Focus on preventing petroleum product contact and maintaining flexibility through regular conditioning.
TPO Care: Emphasize UV protection and thermal expansion management due to its reflective properties.
Frequently Asked Questions About RV Roof Maintenance
How often should I inspect my RV roof?
Monthly visual inspections are ideal, with comprehensive hands-on maintenance performed quarterly. However, inspect immediately after severe weather events or if you notice any interior signs of water intrusion.
What’s the difference between lap sealant and butyl tape?
Lap sealant is a liquid sealant applied with a caulk gun, perfect for filling gaps and creating weather-tight seals around penetrations. Butyl tape is a sticky, putty-like material used for permanent sealing applications, particularly effective for mounting hardware and creating gasket-like seals.
Can I walk on my RV roof?
Most RV roofs are designed to support normal foot traffic, but always check your manufacturer’s specifications. Walk carefully, avoid high-heeled shoes, and be mindful of weak spots around penetrations and edges.
How do I know if my roof needs professional repair?
Signs that warrant professional attention include multiple leak sources, large tears or punctures, structural damage, or extensive UV degradation. If you’re unsure about the severity of damage, a professional inspection can provide peace of mind.
What’s the lifespan of an RV rubber roof?
With proper camper roof maintenance, EPDM roofs typically last 15-20 years, while TPO roofs may last 20-25 years. However, neglected roofs may fail in as little as 5-7 years.
Should I use a pressure washer on my rubber roof?
Never use a pressure washer on your rubber roof. The high pressure can damage the membrane, force water under seals, and create leaks. Always use a garden hose with adjustable spray nozzle for cleaning.
What causes black streaks on my RV roof?
Black streaks are typically caused by oxidation of the rubber membrane, often accelerated by UV exposure and contamination. Regular cleaning and conditioning can prevent and minimize streaking.
How do I prepare my roof for long-term storage?
Clean thoroughly, apply conditioning treatment, inspect and repair all seals, ensure proper drainage, and consider covered storage if possible. Regular inspections during storage help catch problems early.
Advanced Tips for Long-Term Roof Health
Creating a Maintenance Documentation System
Successful RV roof care requires consistent record-keeping. Create a maintenance log that includes:
- Inspection dates and findings
- Maintenance activities performed
- Products used and quantities
- Weather conditions during maintenance
- Photos documenting roof condition over time
- Repair history and warranty information
This documentation helps track your roof’s condition, plan future maintenance, and can be valuable for insurance claims or resale purposes.
Understanding Weather Impact on Roof Performance
Different weather conditions affect your roof in various ways:
Sun and Heat: Accelerate aging, cause thermal expansion, and increase UV damage risk.
Rain and Moisture: Test seal integrity and can cause water damage if penetration occurs.
Snow and Ice: Create weight loads and can cause damage during thawing cycles.
Wind: Can lift membrane edges and stress mounted accessories.
Hail: Causes immediate physical damage that requires prompt repair.
Adjust your maintenance schedule based on the weather conditions your RV faces regularly.
The Economics of Proper Roof Maintenance
Investment vs. Replacement Costs
Let’s break down the real numbers behind roof maintenance:
Annual DIY Maintenance Investment:
- Cleaning supplies: $50-75
- Sealants and treatments: $75-100
- Tools and equipment (amortized): $25-50
- Total Annual Investment: $150-225
Cost of Neglect:
- Interior water damage repair: $2000-5000
- Structural repairs: $3000-8000
- Complete roof replacement: $5000-12000
- Total Neglect Cost: $10,000-25,000
The math is clear: consistent maintenance costs less than 2% of potential repair expenses while preserving your RV’s value and ensuring years of comfortable travel.
Insurance Considerations
Most RV insurance policies cover sudden damage but may not cover gradual deterioration from poor maintenance. Proper travel trailer roof maintenance documentation can:
- Support insurance claims for covered damage
- Demonstrate owner responsibility to insurers
- Potentially reduce premiums through prevention
- Provide evidence for warranty claims
Environmental Impact and Sustainable Practices
Eco-Friendly Maintenance Approaches
Modern RV owners are increasingly concerned about environmental impact. Here are sustainable camper rubber roof treatment practices:
Product Selection:
- Choose biodegradable cleaners when possible
- Select low-VOC sealants and treatments
- Opt for products with minimal packaging
- Consider concentrated formulas to reduce waste
Waste Management:
- Properly dispose of old sealants and chemicals
- Recycle containers when possible
- Minimize water usage during cleaning
- Use reusable cleaning cloths instead of disposables
Longevity Focus:
- Quality products last longer and reduce waste
- Proper maintenance extends roof life
- Preventive care reduces emergency repairs
- Documentation helps optimize product usage
Regional Considerations for RV Roof Maintenance
Climate-Specific Strategies
Your rv roof maintenance routine should adapt to your local climate:
Hot, Dry Climates (Southwest US): Emphasize UV protection and frequent conditioning. Monitor for thermal expansion issues.
Humid Climates (Southeast US): Focus on mold prevention and enhanced ventilation. Check drainage systems regularly.
Cold Climates (Northern States): Prepare for ice damage and thermal cycling. Use cold-weather compatible products.
Coastal Areas: Address salt air corrosion and higher humidity. Rinse roof regularly to remove salt deposits.
Mountain Regions: Account for extreme temperature variations and increased UV exposure at altitude.
Integrating RV Roof Care with Overall Maintenance
Your RV roof maintenance should complement your overall preservation strategy. Just as you might implement comprehensive roof preservation tips for your home, your RV requires an integrated approach:
Coordinated Maintenance Schedule:
- Align roof care with exterior washing
- Combine with HVAC system maintenance
- Include in pre-trip inspection routines
- Coordinate with storage preparation
Cross-System Awareness:
- Roof condition affects interior comfort
- Drainage systems impact exterior appearance
- Sealant integrity affects structural integrity
- Ventilation affects moisture control
Technology and Innovation in RV Roof Care
Emerging Technologies
The RV industry continues to innovate in roof care technology:
Smart Monitoring Systems: Sensors that detect moisture intrusion and alert owners to potential problems.
Advanced Sealants: Self-healing sealants that can close small cracks automatically.
Improved Membranes: New materials with better UV resistance and longer lifespans.
Application Tools: Better spray systems and applicators for more efficient maintenance.
Mobile Apps and Digital Tools
Several smartphone apps can help track your maintenance schedule, identify products, and even provide weather alerts that might affect your roof care routine.
Building Your Roof Maintenance Community
Learning from Fellow RV Owners
Connect with other RV enthusiasts through:
- Online forums and social media groups
- Local RV clubs and rallies
- Manufacturer-specific communities
- YouTube channels and educational content
- RV shows and educational seminars
Sharing experiences and learning from others’ mistakes can accelerate your maintenance knowledge and help you avoid common pitfalls.
Related Roofing Resources
While RV rubber roofs require specialized care, understanding other roofing systems can provide valuable insights:
- Cement Tile Roof Cleaning – Learn about durability and maintenance techniques that apply to permanent structures
- How to Clean a Shingle Roof – Discover cleaning methods that complement RV roof care
- Metal Roof Maintenance – Understand maintenance principles for durable roofing systems
Conclusion: Your Path to RV Roof Maintenance Mastery
Congratulations! You’ve just completed a comprehensive journey through the world of rv rubber roof maintenance. From understanding the basics of rubber roof systems to mastering advanced repair techniques, you now know how to keep your RV’s roof in peak condition for years to come.
Remember, successful roof maintenance isn’t about perfection—it’s about consistency. Monthly inspections, seasonal deep cleaning, prompt repairs, and proper documentation will transform you from a worried owner into a confident RV roof care expert.
The investment in proper camper roof maintenance pays dividends in extended roof life, prevented water damage, maintained RV value, and most importantly, peace of mind during your travels. Whether you’re exploring remote boondocking spots or staying at luxury RV resorts, you’ll rest easy knowing your roof is ready for whatever Mother Nature has in store.
Unlike residential roofing systems that might require specialized knowledge (as covered in our other roofing guides), RV rubber roof maintenance is something every owner can master with the right approach and consistent effort.
Don’t wait until you see that first telltale drip. Start your maintenance routine today, and your future self will thank you for the thousands of dollars saved and the countless worry-free adventures ahead.
Ready to Transform Your RV Roof Care?
Take action today! Start with a thorough inspection of your current roof condition, create your maintenance schedule, and bookmark this guide for future reference. Your RV roof is counting on you—and with the knowledge you’ve gained here, you’re ready to rise to the challenge.
Remember: A well-maintained roof isn’t just about preventing leaks—it’s about preserving your freedom to explore, your investment in the RV lifestyle, and your confidence in every adventure that lies ahead.
Safe travels, and may your roof always keep you dry!